DM_Snowfall (HL2DM) - The making of.

Click the pictures for full size!
download:
http://www.lonefox.pwp.blueyonder.co.uk/dm_snowfall.zipIntroductionThis article gives an overview of how I created my hl2 deathmatch level dm_snowfall and also covers what design decision I had to take and what I've learnt.
The map itself started as a small test project to see how viable a full arctic environment would be for the source engine, I had initially planned to do a small single player map pack based on some of the events revealed during episode 2 using Mossman’s video feed as a base for the story. However there appeared to be a complete lack of resources to do this within the source engine, I think there were two snow textures in total and not much in the lack of models either and as my texturing and modelling skills were non-existent at this point (which I am now rectifying) I decided a small test map would be the best idea.
Initial Concept and design.Below are the concept and layout drawing I sketched up, apologies for the quality the scanner took in the back side of the pages too!
I wanted to have what seemed like an abandoned mining station on the side of a mountain. I did this for a few reasons, firstly if it was just a mountain with some caves why would the player be there in the first place. Secondly it added some atmosphere to the map, I was hoping the players would be asking themselves: what happened here? Where did everyone go? And finally it gave me the opportunity to use more of the hl2 textures and props.
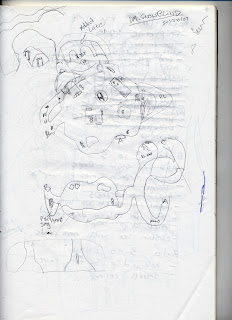

This first picture is a top down layout of the map the top section is the outside area and bottom bit is the underground area. The layout stayed pretty much how is shown although there were a few changes, the biggest change was the introduction of a new area entirely and the removal of the dome shaped hut, this can be seen at the top most section of the picture. After initial testing the flow of the area with the dome hut was terrible, in an effort to open up the map a little and give it more flow I decided to add in a new room with 2 entrances, one behind where the hut used to be and the other on the far end of the same wall. The only other changes were the removal of a hole in the main area which led to a side path, this area was problematic from the get go and I removed it.
Base Construction.After doing a small test of creating tunnels with displacements I was ready to get started, I jumped straight in with my tunnel sections, created two or 3 tunnels, compiled and got a face full of leaks. It turned out that displacements didn't seal the level so I had to use a set of normal brushes around all my twisting tunnels to seal the map. It was at this point I felt I needed to take a step back and work on another approach. I sat back, read a few articles and started again, this time with a different method. I would do the whole map in block form then start adding details and lighting after.
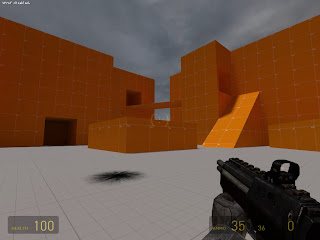
Here is a picture of the basic boxed outdoor area.
Once I had the layout done it was time to flesh out the tunnels with some displacements, all seemed to be going well. I compiled and this is what I saw:
I posted on a few forums trying to work out what the problem was and thankfully it just turned out to be the dev textures, I also tidied up my displacements after a suggestion on the forums to line it up another way the original thread is here:
http://www.interlopers.net/forum/viewtopic.php?f=2&t=20906
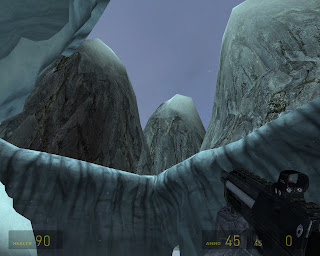
Adding the detail.After the basic layout was done I decided to do a quick texture pass as the displacements had strange lighting on them with the dev textures, this shot was taken after I had finished the bridge, notice the small tunnel on the top of the bridge, this section was removed. The main reason for this was it would not fit in with the architecture, I tried several different versions of this but it just made no sense structurally and aesthetically so I took the decision to remove it entirely.
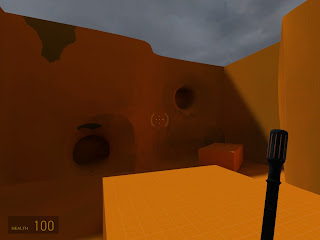
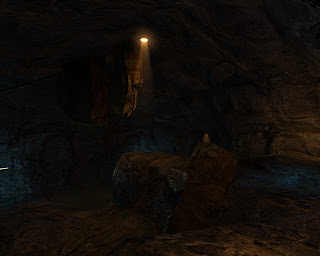
After the first texture pass I decided to put in some lighting, at first I had some basic orange type lights
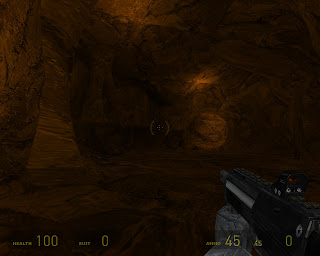
As you can see it is quite hard to make out the different parts in this screenshot. It is at this point I got hold of a copy of Hourences "Hows and Whys of level design". After reading the section on lighting I decided to put some of these new techniques in to action. I settled on two main colours for my map, blue for the cold outside area and a warm orange for inside the caves and hut. I also used blue a little in the caves to contrast with the orange to avoid the bland scenes shown above.
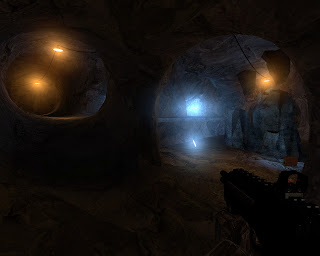
At this stage the glows were far too bright, this was toned down a lot in the versions to come, but as can be seen things were starting to take shape, the lighting looked ok and I was happy with what I was seeing.
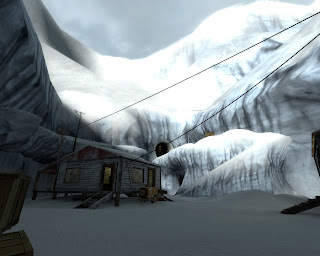
The next hurdle came after I created the hut outside:
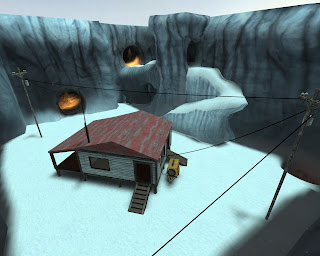
The roof texture didn’t fit with the scene as there was no snow on it which looked slightly odd. It was at this point I had to delve into a bit of custom texturing and whip up a blend texture with the roof and the snow, fortunately all this took was a simple text file as the textures were already created I just needed to create a new blend one with these two already made textures. After looking around I found out how to do, this small piece of code in a .vmt file created the new blend texture I was looking for.
"worldvertextransition"
{
"$basetexture" "wood/woodwall045a"
"$basetexture2" "nature/snowfloor002a"
"%keywords" "snowblend"
}
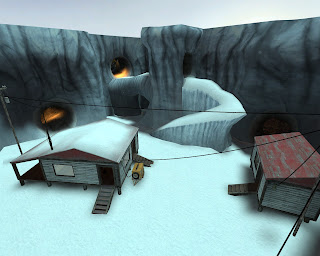
After realising how effective this was I created another to blend the rock wall into snow and also the floor entrance to the caves. The right hut was also created during this time but was yet to be textured with the blending along with a few other small details and props:
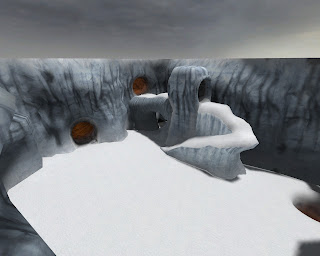
It was around this time I had also started to create the 3d skybox, the first few attempts didn’t fit very well, this was the first attempt at it:
It just didn't seem to fit, nor did it look like the level was set on the side of a mountain, after 4-5 different attempts at this I started to get something I liked, this was more or less the final version of the 3d skybox:
 Testing and release.
Around the time I started to create the custom texture I also held a few internal alpha's to get some feedback and constructive criticism it was at this point I decided to add the new room to open up the flow of the level and also added an overlook to give the map a larger sense of scale.
The new room:
After the layout was locked down I went to public beta to get some more general feedback, most of it was quiet positive with a few very good suggestions which I took onboard before the final release, the biggest of these was probably the new route in the outside area which was suggested to open up game play some more. This can be seen below in the top left
Another suggestion was to make the caves seem more open just like I did with the outside overlook. I took two dead ends in the caves and added some depth to them making sure to clearly sign post them as to not confuse the players whether they could get down the fake passages or not.

I also tightened up the weapon layout a bit at this point as the underground area didn't really have much in terms of weaponry, well at least not enough to entice the player down there. I changed the position of the AR2 and also tweaked the RPG position to further back in to overlook dead end to raise the risk enough (getting shot in the back) to warrant the reward of the powerful weapon.
At this point I felt I had achieved everything I wanted to with this level and decided to release it, I posted on three or four different forums and also signed up to FPSBanana.
Conclusion
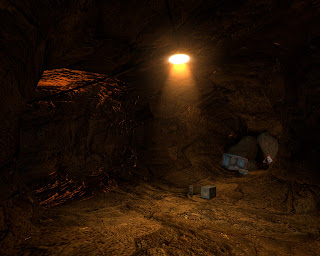
Overall I felt it turned out quiet well, the responses I received after release were of good quality and there were no major complaints about the game play or the looks of the level. The one thing that came back to haunt me a little however was leaving in a statue in one of the lower caves, I had intended it to be a sort of discovery to get the player thinking "what did they find here?" however it looked slightly out of place which I didn't really notice un till someone mentioned it and I had time to sit back and take a break from the level and come back to look at it. Looking at it through the entire development cycle I kind of got used to it and I didn't even consider it after a while. It's possible I am being over critical and hopefully not many people will notice it but I will certainly keep this lesson in mind for my next levels.
I learnt quiet a few new techniques during this one such as custom textures, contrasting lighting, displacements and also to be patient at the start of production! Before this level id usually do it room by room adding in bits as I seen fit. I realise now doing it in stages is definitely the way forward, in the future I will most certainly be taking the extra time and effort in the design, concept and base construction phases instead of jumping straight in with the details as it helps in the long run by not having to go back and fix mistakes.


